In this article, I will show you how to charge a trolling motor battery with solar.
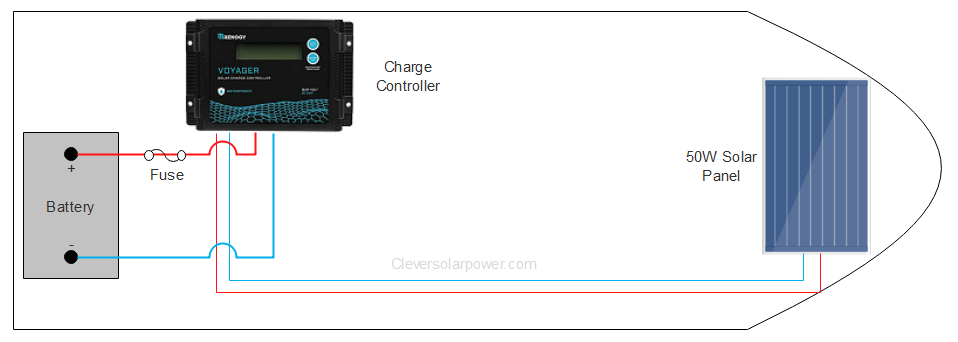
Charging a battery with solar power is actually quite simple. Here are the steps:
- Selecting and mounting a solar panel
- Connect the battery to the charge controller
- Connect the solar panel to the battery
As simple as that!
Supplies:
- 50W solar panel
- Solar panel mounting kit (optional)
- MC-4 extension wires
- Waterproof PWM charge controller
- Battery cables with fuse and lug
Why DIY and not buy?
Most cheap kits which are available are underpowered and not compatible with all batteries such as lithium (LiFePO4). The customer support is vague to say the least and the solar panels’ power is often overstated.
Step 1: Selecting and mounting a solar panel
Let’s assume you have a 12V, 100Ah lithium trolling battery. This battery has an available energy of:
12V*100Ah= 1,200Wh
To charge a battery with a 10W solar panel, it’s going to take:
1,200Wh/10W= 120 hours of sunshine
Now that might be a bit long, and we didn’t even factor in the losses and the bad weather. That’s why I would aim for a 50W solar panel.
1,200Wh/50W= 24 hours of sunshine
24 hours of sunshine / 3 hours per day = 8 days
A 50W panel seems to be a good middle ground between size and charging capability.
I recommend using the Renogy 50W solar panel.

You can leave the panel flat or use a mount to angle the solar panel better to the sun for increased energy production. If you are going to use a mount, I recommend the Renogy mounting system which can be adjusted from 0° to 90°.
The solar panel will come with MC-4 connectors, but the length will be too short. Therefore we have to add an extension wire to it. The cheapest with MC-4 connectors I have found are from BougeRV. Check it out here.
Step 2: Connecting the battery to the charge controller
We have to connect the battery to the charge controller first. If we connect the solar panel to the charge controller first, then it might damage it.
We must place the charge controller as close to the battery as possible. This is to prevent losses in the wire.
I have chosen the 10A Renogy (again) Voyager PWM charge controller. This is because this charge controller is cheaper than a MPPT, is waterproof, and is compatible with lithium batteries.
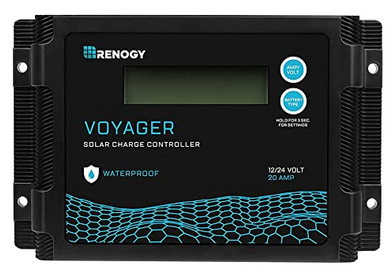
Now we need to calculate the maximum current that can travel through the wire into the battery.
The maximum current this charge controller can deliver is 10A. We need to apply a safety factor of 125%:
10A * 1.25 = 12.5A
We need a wire that can carry 12.5A and a fuse that is rated under the maximum current of the wire.
A wire that can carry 12.5A is 14AWG (2.5mm²) as we can see from the table below (source).
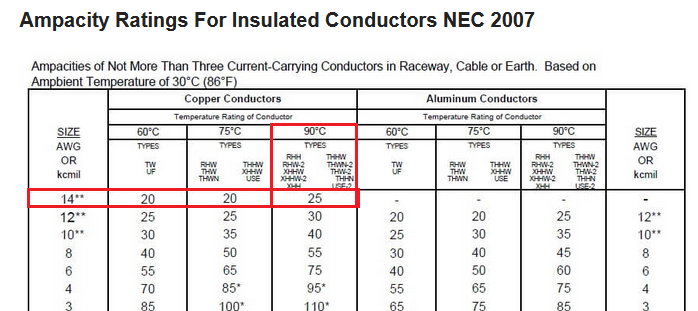
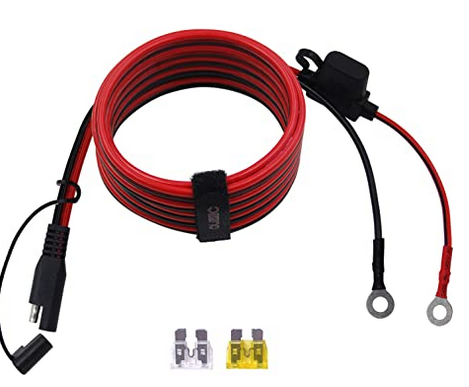
We can use 14AWG (2.5mm²) or greater is the distance is short. I have found a 14AWG cable with an inline fuse holder here.
The size of the fuse is 20A, that’s ok because a 14AWG (2.5mm²) wire can carry 25amps. We need to cut the end connector from the cable and attach it to the charge controller.
Step 3: Connect the solar panel to the battery
The 50-Watt solar panel will come with MC-4 connectors attached. These connectors will be water proof.
The solar panels can be a long distance to your charge controller, therefore I recommend using an extention lead. I recommend this one you can select from 10 to 20ft length. We can use a 12AWG wire for this.
Let’s calculate the voltage drop to the charge controller just to be sure.
- Voc: 18.6V
- Max current: Isc * 1.56 = 2.94A*1.56 = 4.58A (1.56 is a safety factor for outdoor use)
Let’s put these values into the voltage drop calculator:
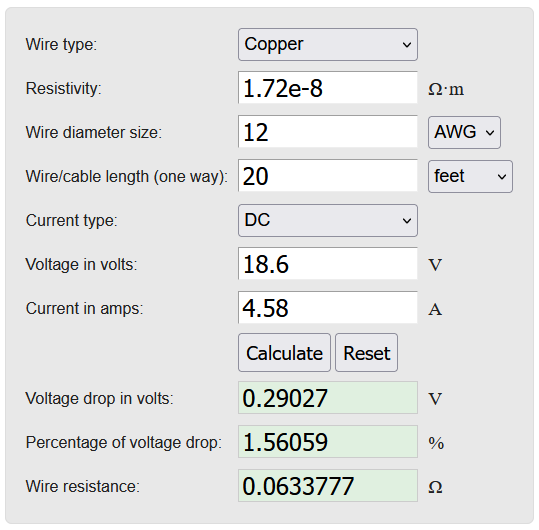
All good! We will stay below a 3% voltage drop while using a 20ft 12AWG conductor.
When the extension leads arrive at the charge controller, you can cut the ends off to limit the wire length. Because extra wire means more resistance and more losses.
To conclude this will be the schematic for charging a trolling motor battery with solar:


I’m an off-grid enthusiast. I created this website to give clear and straight-to-the-point advice about solar power. I’m also the author of the book ‘Off-grid solar power simplified‘. Read more about me on my about page, check out my Youtube channel, or send me a message.
Good afternoon,
I am very grateful to have found your link; it is what I have been looking for.
Could you please tell me if all the items listed above would work with a EverStart Lawn & Garden 12 volt battery, 230 cold cranking amps, with a trolling motor 46lbs thrust?
Thank you very much,
Christine Auclair
Cold cranking is a starting battery, and it’s lead-acid. So while it can work, it’s not made for long usage.
see email above
Thank you.
Nick, thanks for the info. About to start construction of a 12 barrel pontoon boat. Looking to power it with solar power.
Good luck! Checkout my beginners playlist here
My trolling motor is 24V so I’m setup with a 24V 110Amp lithium battery. How would the above setup need to change for a 24V battery?
Since you have a 24V battery, you need two solar panels in series rated at 18Vmp. so the solar panel voltage is higher than your battery voltage. You need a PWM or MPPT charge controller that is compatible with a 24V lithium battery.
I have a minnkota 24v system using 2 lead acid batteries -12v how would recommend I recharge with solar ?
Do you have a balancer? Since the batteries are in series. Recharge with two 100W solar panels in series because the solar panel voltage needs to be above the battery voltage. so 18V+18V=36V = higher than 24V.