This article will explain how you can bottom balance your lithium iron phosphate (LiFePO4) cells. In some cases, you don’t need to balance at all.
Why bottom balance LiFePO4 cells?
Bottom or top balancing isn’t needed if your seller has sold you cells with the same internal resistance.
I recommend commissioning your battery cells without top or bottom balancing. After a few cycles, look at the individual cell voltages of your BMS (battery management system). A bottom balance will be a good idea when the individual cell voltage differs when the battery is fully charged or discharged.
Depending on the kind of BMS you have, it has a built-in balancing function. These balancing currents are usually low 20mA-2A.
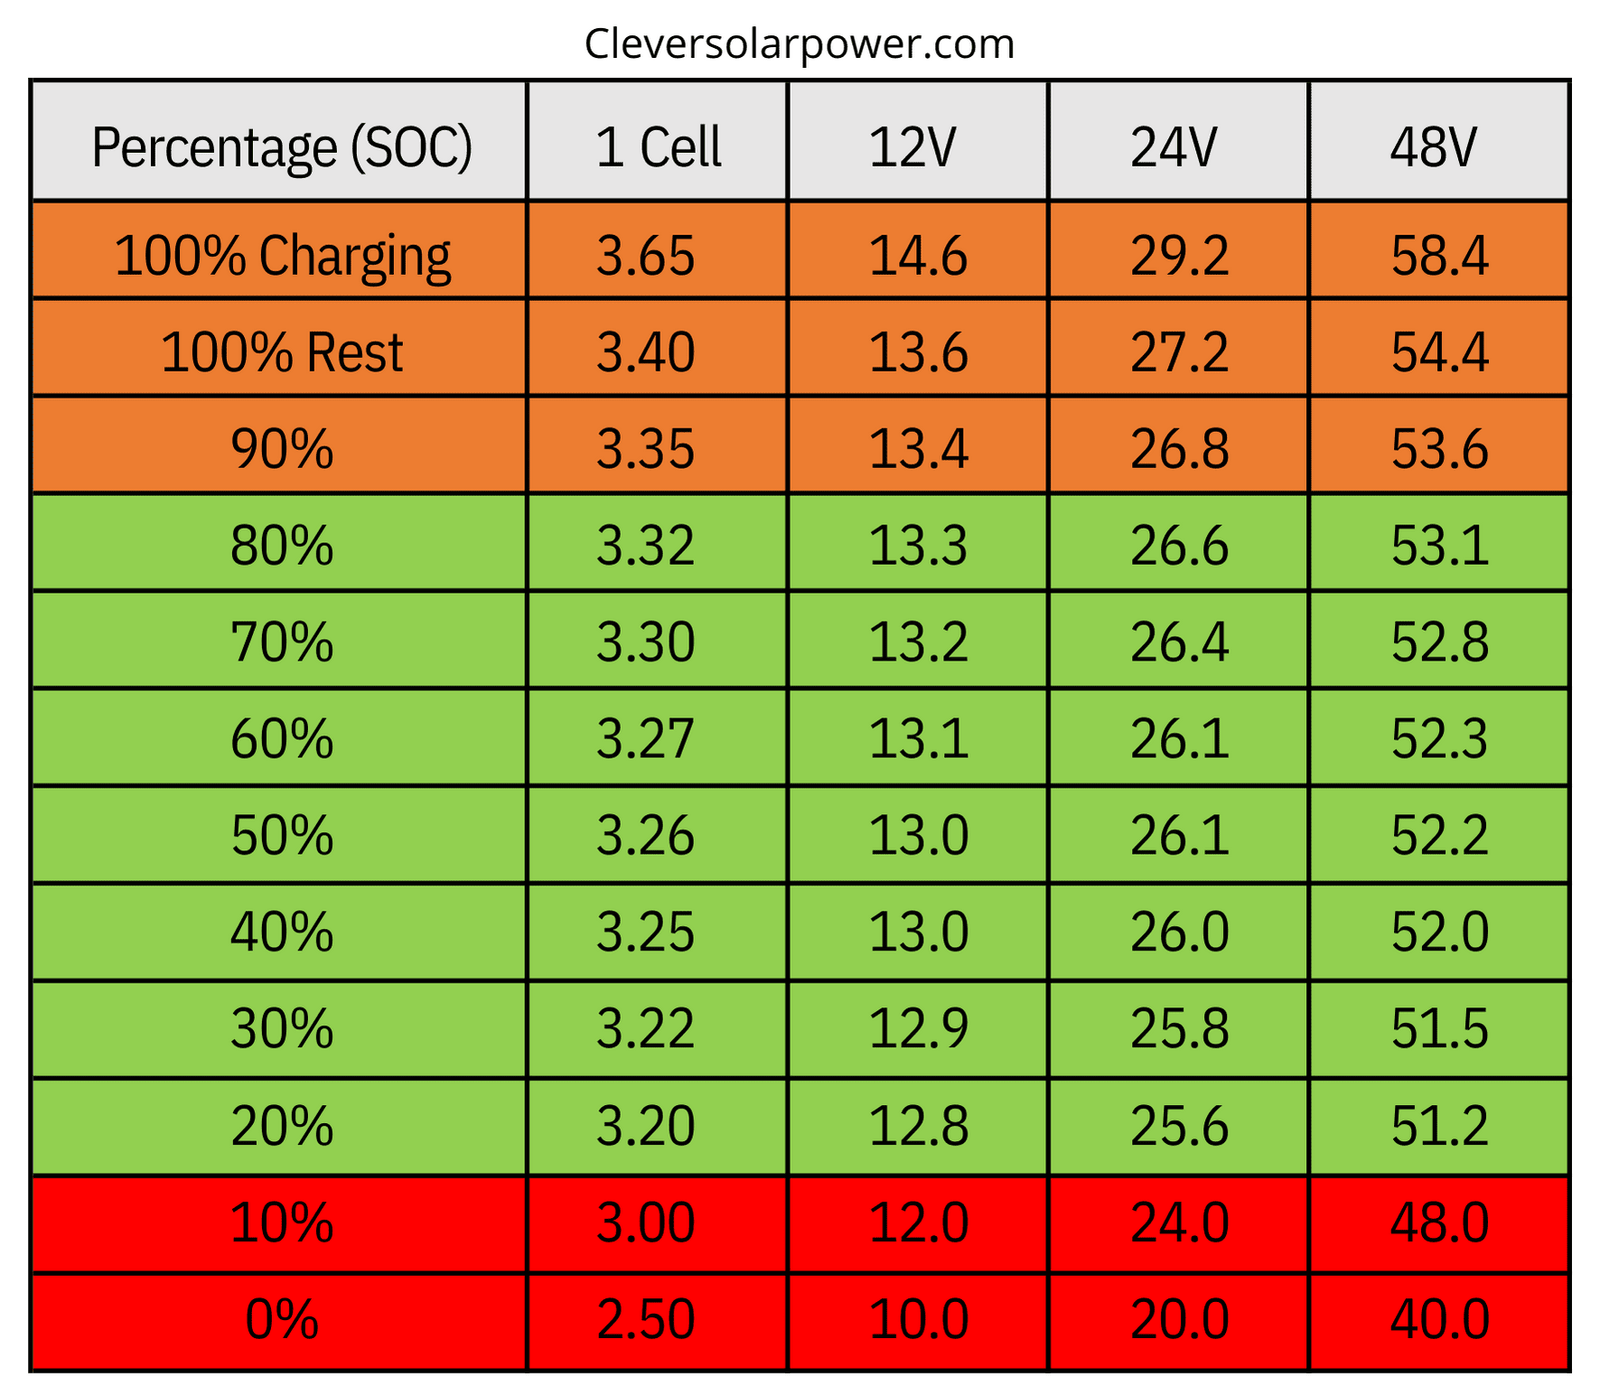
This is a LifePO4 battery voltage chart for your reference:
Bottom balancing is equally as good as top balancing. Instead of charging the pack with a power source, we will drain the battery cells to their lowest voltage. This is usually 2.65V per cel for LiFePO4.
This is a good method if you don’t have a power source available. Perfect for off-grid systems.
Difference Between Top and Bottom Balance
Top balancing:
Focuses on the voltage of the battery. This means that you will charge your battery to 3.65V, which will be 100%, or the full capacity of the battery. If one cell has less capacity than the other cells, it means that this cell is the weakest. The weak cell will be the first to be discharged and the first to be fully charged.

This results in one cell having a higher voltage than the others. The BMS will cut off the power to the BMS and start to balance. The voltage of the bad cell will drop. Once it’s below the maximum voltage threshold of the BMS, the battery will start to charge again. This results in one cell (the bad one) being worked extra. This will lead to more degradation.
Bottom balancing:
This focuses on the capacity of the battery. This means that at 2.5V, the cells will have 0Ah in them.
If you have a battery pack that is always unbalanced, a bottom balance will help. After you have done the bottom balance, you need to turn off the balancing function of the BMS. Otherwise, it will negate the effect of the bottom balance.
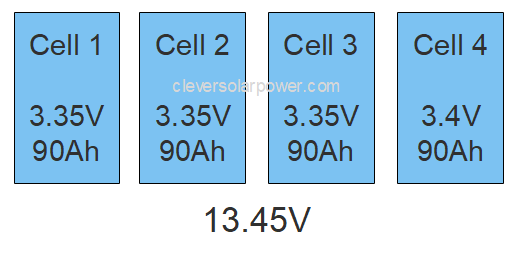
If one cell has 90Ah, while the rest is 100Ah, a bottom balance without a balancing function on the BMS will be your best option. The rest of the battery will get charged to 90Ah.

The off-grid garage did a great video about bottom balancing. Check it out here:
How to Bottom Balance LiFePO4 cells?
Bottom balancing the cells is quite easy and doesn’t need much equipment. The equipment needed will be cheaper than top balancing. You will spend about $10 on a few resistors (discussed later).
- Discharge every cell to 2.5 volts. This is 0% capacity. Read the next subheading on how to do this properly.
- Connect the cells in series to make your 12V, 24V, or 48V battery. Do not attach the BMS.
- Start charging the whole battery. Do not leave out any cells.
- Once one cell reaches 3.65Volts (the weakest will be the fastest), add up the voltage of every cell and set this as the maximum charging voltage of the battery in the BMS.
- Turn off the balancing function of your BMS.
How to discharge the cells to 2.5Volts?
Normally the cells come from the factory charged at 30%. This is for safety reasons during transport. You can add the cells in series and add your inverter to it. Start running a load until one cell hits 2.5Volts. Initially, the cells will go up a few millivolts after the load is disconnected. Continue the load but use a smaller one so the voltage doesn’t drop much. In the end, not all of the cells will be at 2.5Volts.

Now you need to disconnect the cells from each other and discharge them separately. You need to use a resistor or multiple in parallel (this one on amazon). This is to discharge the battery cell to 2.5Volts.
Conclusion
There you have it.
The reason and how to bottom balance LiFePO4 (lithium iron phosphate) battery cells.
Some people bottom balance to not use a BMS. This is possible and is not risky; however, if you are a beginner, I still recommend having a BMS to monitor individual cell voltages to be safe.
If you have questions or comments, leave them below.
 I have written a book that contains all the information you need to get started with off-grid solar power.
With over 1,800 reviews at 4.5 stars, I can almost guarantee that this book will save you $100s on buying the right equipment.
You can get it here on Amazon.com

I’m an off-grid enthusiast. I created this website to give clear and straight-to-the-point advice about solar power. I’m also the author of the book ‘Off-grid solar power simplified‘. Read more about me on my about page, check out my Youtube channel, or send me a message.
Hello Nick,
I have carefully read your instructions. Unfortunately I still have a question.
I have a 16S 280AH Eve 3.2V system and am wondering what voltage do I need to charge everything with when it is reassembled. ?? volts and amps
3,2volt 10 A or 58Volt + ???? Ampere
Andy
Hello Andy,
Checkout this page for voltage levels. To charge a 48V battery, you should charge at 58.4V at a maximum of 140A (0.5C).